No products in the cart.
Here we are in January 2021, and I don’t know about you but it almost feels like the 13th month of 2020 rather than the first month in a new year. But it’s okay, we’ll batten down the hatches, dig out our crafty goodies and get down to business.
The lovely Diane has another tutorial for us. This time using January’s Stampscription stamps.
You will need
8″x8″ white card blank
Distress inks, picked raspberry, ripe persimmon, scattered straw
Foam tape
Ribbon
Fine liner back pen
Glue
Washi tape
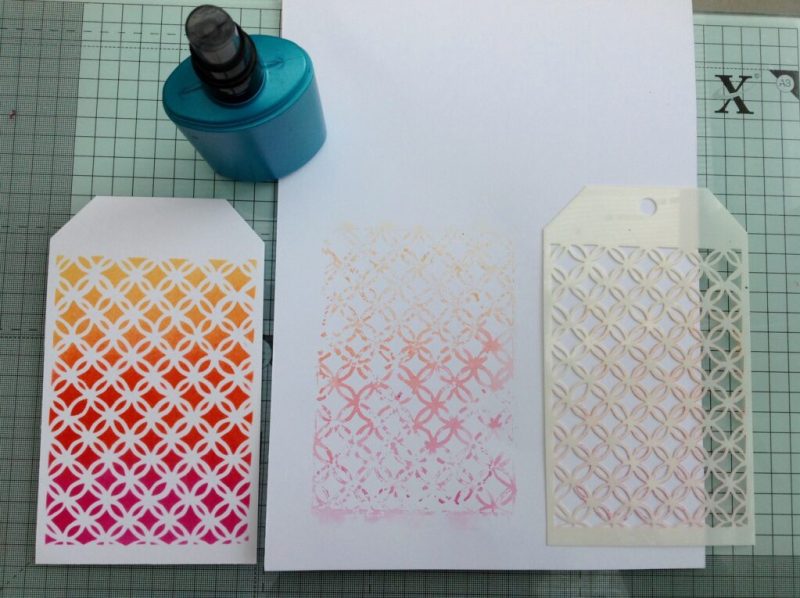
1: Place stencil on top fold of card blank, draw round and then cut out.

2: Open tag shape card base and tape front to glass mat using washi tap. Starting with picked raspberry distress ink, make a stripe of each colour working from the bottom up and blending as you go.

3: Carefully remove tape and stencil, then add black fine line round edge of colour. Don’t waste ink on stencil, lightly spray with water and then press onto a piece of white card. This can now be used to make another card background later.
4: Stamp onto a 3″ tag your sentiment, ink round edge and add black fine line round edge. Next stamp cat thanks onto a 1 1/8 x 2 1/8 piece of white card, colour and add black fine line round edge. Stamp cat bucket onto white card, colour and then fussy cut out.

5: With foam tape, mount cat thanks to front of tag and then glue to front of card adding ribbon bow to top. Next mount cat bucket onto bottom of card using foam tape.

6: Now I mentioned about making a second card using the inked stencil background, well here it is.


Notifications